Connecting to the UND HPC Clusters
Here is some basic information on how to connect to the UND HPC Linux clusters. This tutorial assumes you have already requested an account and are ready to connect. If you have not done so follow the link on this page: HPC info.
You must use SSH to connect to Talon. SSH Port-forwarding for the use of GUI applications is allowed, but not for computational work unless special arrangements are made prior to the work being run.
Hostname:
In this tutorial we will connect to the Talon HPC cluster using the following hostname: talon.und.edu
The Hodor and Arya clusters have been converted to queues under Talon. To submit jobs to Hodor and Arya, you will log into Talon.
Connecting using a Windows computer:
Connecting using a windows computer will require some additional programs to be installed on your local computer. These are what allow you to connect using the various protocols such as SSH and SFTP.
The all in one program: MobaXterm
MobaXterm (https://mobaxterm.mobatek.net/) is an all in one program that has the ability to connect to the command line, transfer files, and view graphical interfaces.
Putty Connections (SSH Graphical Terminal):
Putty is a GUI telnet client with SSH capabilities for use on Windows operating systems. A link to the a portable version of Putty is available from the UND CRC Windows Desktop Software page: http://www1.und.edu/research/computational-research-center/support/windows_software.cfm
This version of Putty does not need to be "installed". Once it is downloaded, copy the program to your desktop. It will then be ready for immediate use. Double click the putty icon to get started:
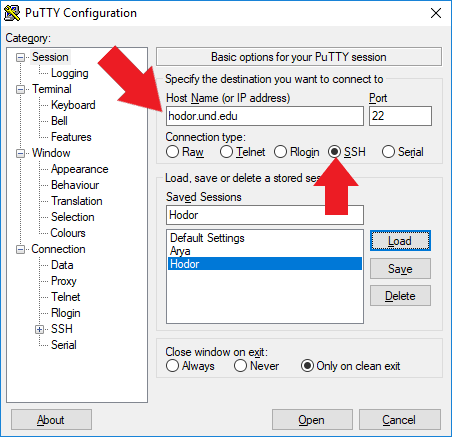
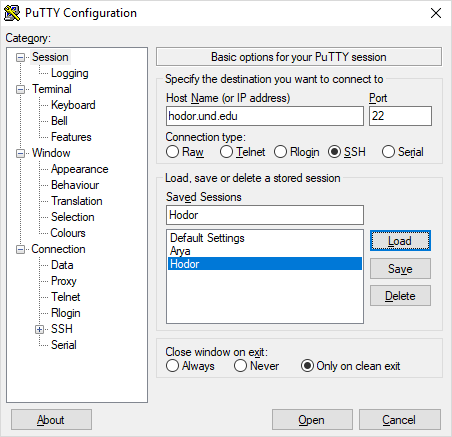
Once you’ve started the Putty you should see something similar to the image below. Do the following:
1. Type the hostname in the appropriate box – remember from above the hostname is: Talon.und.edu
2. Check the "SSH" button.
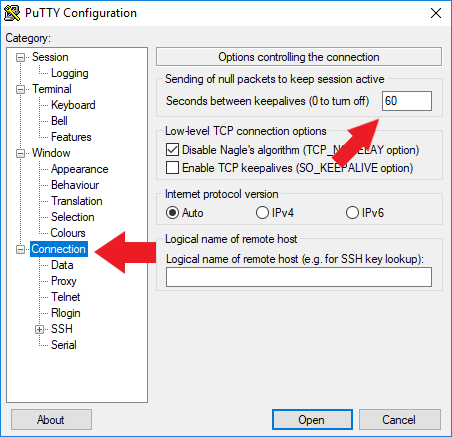
Next, go to the "Connection" options window: 1. Change the "keepalive" value from ‘0’ to a value of ’60’. This will help to prevent you from getting disconnected from the cluster during low activity periods (ie. when you’re reading code, but not typing).
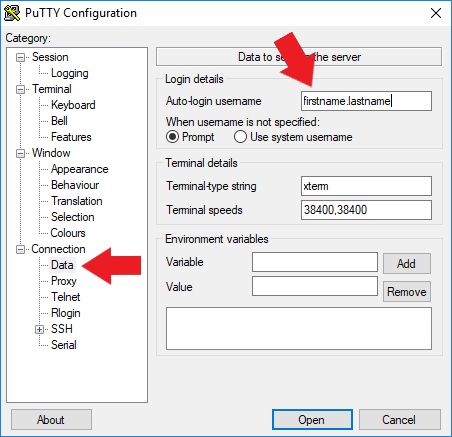
- Go to the Data tab under connection
- Enter your NDUSAD/UNDCC login - firstname.lastname (Substitute your actual login please)
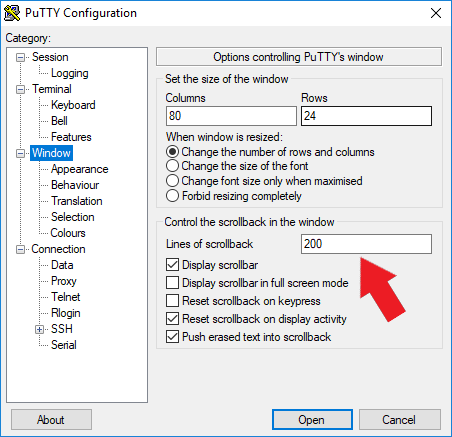
- Optional: By default the scrollback in Putty is 200 lines. When looking through error messages this may not be enough. To increase this go to the "Window" tab and change the lines of scrollback.
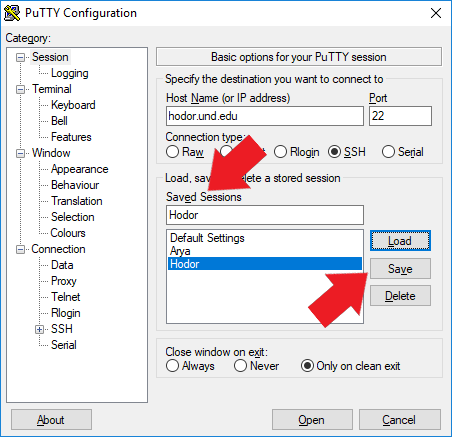
Finally return to the "Session" options page: 1. Click on the "Session" option. 2. Type "Talon cluster" in the "Saved Sessions" box. 3. Press the "Save" button to save that session for future use. 4. Press the "Open" button to connect to the login node (aka "headnode").
Once you have pressed the "Open" button, the Putty program will connect you to the login node (aka the "headenode"), and you will be prompted for your NDUSAD/UNDCC password. Once you’ve entered it, the cluster will be available for you to use.
In future connections, you simply will need to double click the Putty icon to start the program, and then:
- double click the "Talon cluster" option from the list
or if you want to modify settings before connecting
- Select "Talon cluster" from your Saved Sessions list.
- Press the "Load" button.
- Press the "Open" button. As before, once you press the "Open" button, Putty will connect you to the Talon login node.
At this point you are ready to use the cluster. If you need to transfer files from your computer continue on with the next section covering SFTP file transfers.
Connecting using WinSCP (SFTP File Transfer)
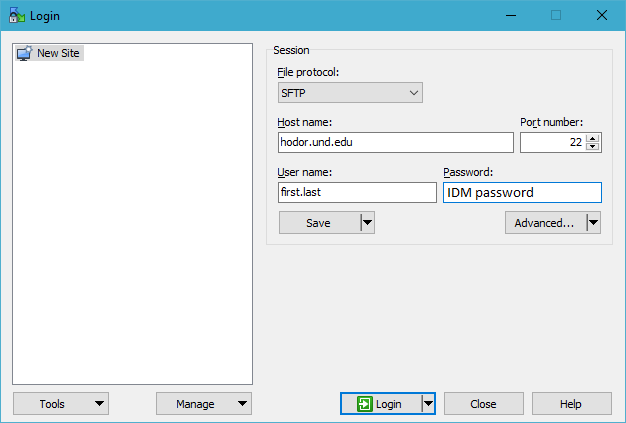
When you first open WinSCP the login window should appear.
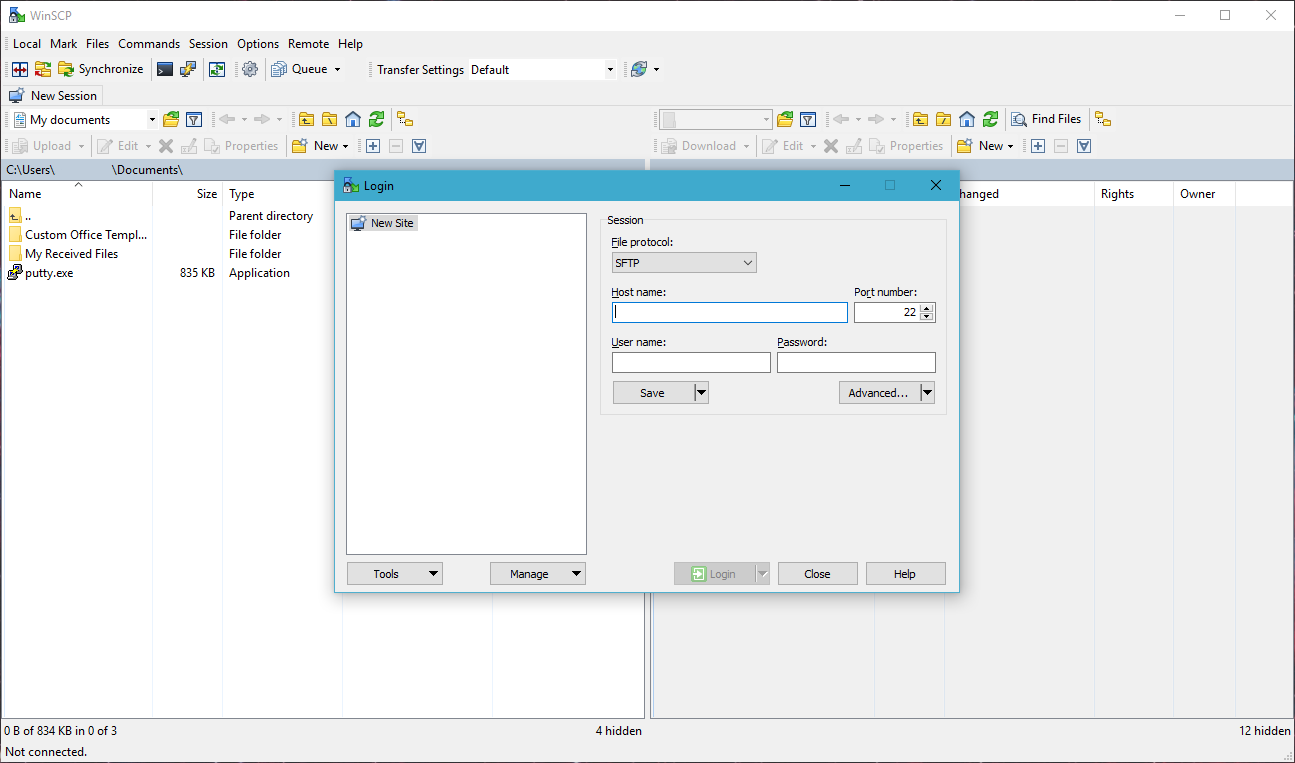
To login, enter the server hostname (ex. Talon.und.edu) and your IDM login.
Transferring files with WinSCP
After you log in, you will be presented with the main screen. On the left is your local machine and the server you have connected to is on the right.

To download a file from the server to your computer 1. Navigate to the file on the server using the file browser on the right side 2. Navigate to the location you want to download the file to on your local computer using the file browser on the left 3. Initiate the transfer using one of the following methods
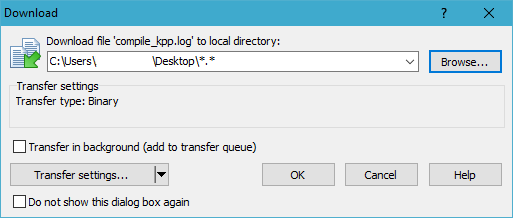
- Click on the file and then click download up on the top bar
- This will bring up a new window that will allow you to adjust some settings
- once you have everything how you want it click ok to start the download
- Drag the file from the right side to the left side. This will automatically start the transfer
Uploading files from your computer to the server is the same process. The only difference is that you would click upload above the local file browser or move the files from left to right
Connecting using Xming (X11 GUI forwarding)
You must use an SSH client to connect to the clusters. SSH Port-forwarding for the use of GUI applications is allowed, but not for computational work unless special arrangements are made prior to the work being run.
Here is some basic information on how to connect to the UND HPC Linux clusters using Xming. Xming allows you to use programs that would normally run in a regular desktop environment with graphical user interfaces. This section assumes you have been able to connect regularly with Putty. If you haven't connect using putty before see above.
Download and install:
The first step is to download and install the Xming program. You can find it here or via a link to download in our list of Windows Software. Once you have it downloaded you install it as you would any other windows program.
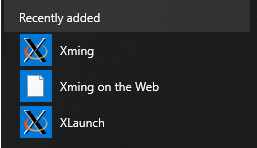
After you have it installed there should be 2 new applications in your start menu, Xming and XLaunch.
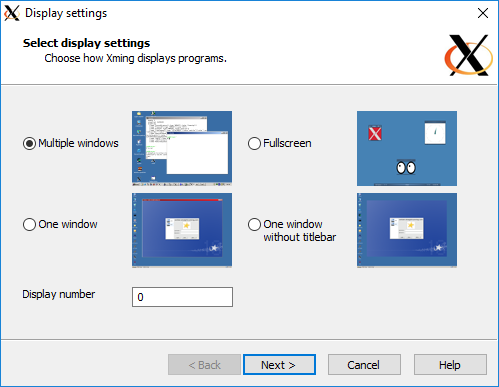
- Open XLaunch
- Select
Multiple windowsand then click Next
- Select
Start no clientand then click Next
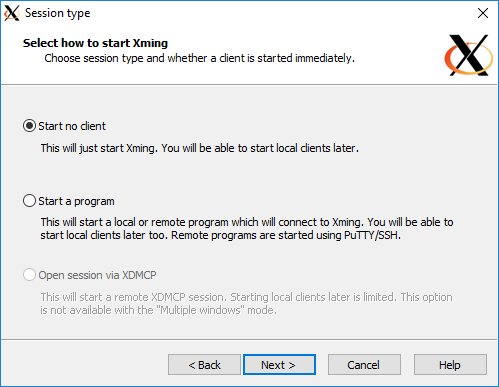
- Leave this page as it is and click Next
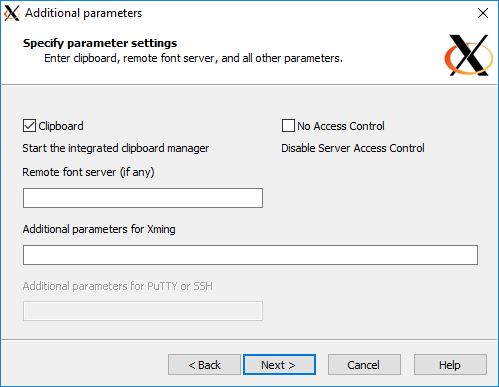
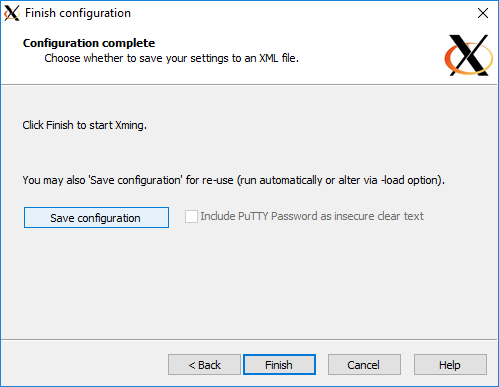
- Click
Save configurationand then Finish
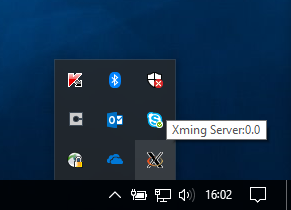
- Launch Xming. (to see if it is running check your hidden icons in the taskbar)
Connecting to the Talon HPC Cluster using Xming
You must use an SSH client to connect to Talon with SSH Port-forwarding enabled. We will be using Putty.
Assuming you have followed the section on connecting to the cluster using Putty, you should have the settings for Talon in your saved sessions.
- With the Talon option selected press the load button to bring up all the saved settings
- Under the
Connection > SSH > X11check the box that says "Enable X11 forwarding"
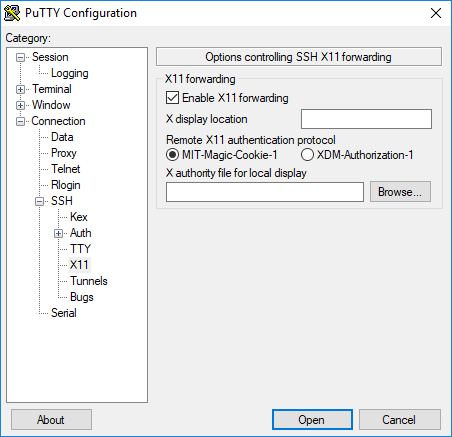
- Once it is checked, go back to the main screen under
Sessionand save your configuration
Testing
To test whether your Xming is working properly try logging into the cluster and running the following commands
[first.last@Talon ~]$ which xclockThis should give the following results:
/usr/bin/xclockIf that worked you should be able to simply run xclock in the terminal and a clock should show up in a new window.

If the clock doesn't show up and you have the following error Error: Can't open display: localhost:10.0 it means Xming is not running. Try starting it again using the windows start menu.
Cygwin Connections (SSH Commandline Terminal):
While Windows users may also utilize Cygwin to connect to Talon, an overview of how to download, install, and use Cygwin is outside the scope of this document.
If you do install it you can generally follow the Unix connection tutorial to connect to the terminal.
Connecting using an Mac/OSX or Linux computer:
Connecting to the clusters using Unix based operating systems (Mac/OSX and Linux) is generally easier because many of the bare minimum programs are already installed. For connecting to the terminal and forwarding X11 sessions there is really no need to install any different programs. For file transfer you can install a GUI if you want.
Terminal Connection (SSH Terminal):
If using a Linux, OSX, or Cygwin terminal, you may type the following command at the shell prompt to connect to the Talon login node (aka "headnode"):
ssh firstname.lastname@talon.und.eduTo prevent you from getting disconnected from the cluster during low activity periods (ex. when reading code, but not typing), set the ServerAliveInterval to 60.
ssh -o ServerAliveInterval=60 firstname.lastname@talon.und.eduOnce connected, you’ll be prompted for your NDUSAD/UNDCC password.
SFTP Connection (File Transfer):
Logging in with the command line
Open Terminal and enter the following command:
sftp first.last@hostname
Logging into Talon, it would look like this:
sftp john.doe@Talon.und.eduIt will then ask for your password. Once you enter it the sftp prompt should be displayed:
sftp>Transferring files with the command line
At the sftp> prompt, use the cd command to change to the directory of the file you want to transfer.
Use lcd local/download/path to set the directory where you want the file to go on your local machine.
Once you are in the directory where your file is located, you can type:
get filenamethis will download the remote file to your machine.
If you want to upload a file, use:
put local/path/to/file remote/pathType quit to exit the sftp> prompt.
Some commands
cd- Change remote directorylcd- Change local directoryget filename- Download filename to local machinemkdir dirname- Make new directory on remote machinelmkdir dirname- Make directory on local machineput /path/to/local/file/file.exe /remote/path- Upload file to the designated pathpwd- Print the remote working directorylpwd- Print the local working directoryrename /path/file.exe /path/file2.exe- Change file name on remote machinerm- Remove remote directorybye, exit, quit- Quit SFTP.
X11 Forwarding (GUI Forwarding):
On a linux computer all you should need to do is add the -y flag to your ssh command like so.
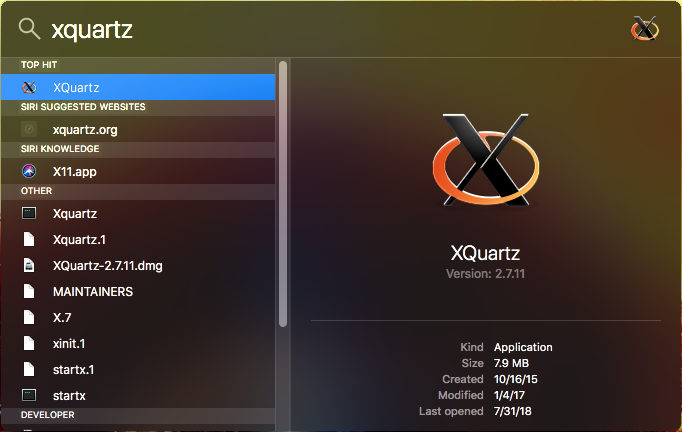
ssh user.name@Talon.und.edu -yIf you are on a Mac/OSX computer you will need to install Xquartz.
X11 used to be included with macOS. Apple no longer includes X11 with macOS but it can be downloaded from the website below. It is now maintained by a third party that has renamed it "XQuartz".
Configuring your Mac for X11
- Download XQuartz here.
- Open the .dmg file and run the .pkg installer.
- Click "Continue" three times.
- Agree to the License Agreement.
- Click "Install". It will ask for your password.
- Once you see the "Installation Complete" screen you can close the installer.
- XQuartz is now installed on your computer. No further configuration is required. The icon looks like this:Icon
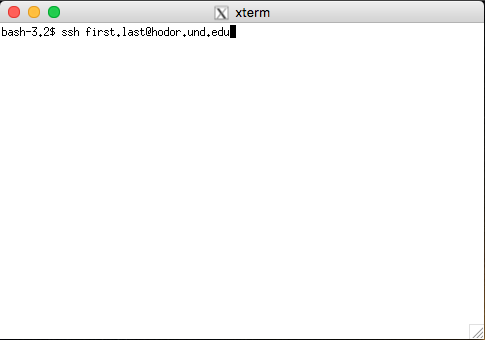
- Open XQuartz. It does the same thing as the built-in terminal, but includes X11 forwarding. Xterm1

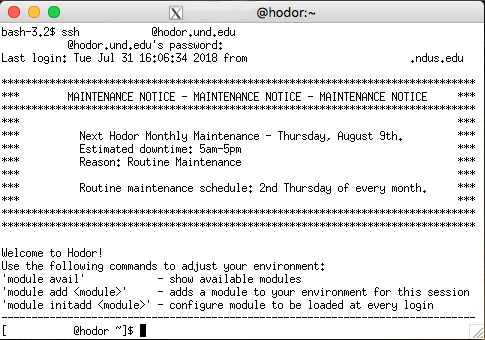
- You log in to the cluster the same way you would using the built-in terminal. Xterm2 Xterm3